
Caulking might seem like a mundane DIY task, but it’s the secret sauce for a waterproof and clean bathroom. Proper caulking prevents water seepage, stops mold from taking over, and keeps your bathroom looking sharp. It’s a simple maintenance step that can save you plenty of headaches down the line.
Alright, let’s start with gathering our gear. You’ll want to have a 100% silicone caulk on hand, ideal for tubs and showers because it’s both waterproof and flexible. A caulk gun, utility knife or a handy caulk remover tool, painter’s tape, and some rubbing alcohol or vinegar for cleaning are also must-haves. Don’t forget paper towels or rags for cleanup and a smoothing tool—or even your finger can do the trick in a pinch.
Setting the stage for a successful caulking job begins with saying goodbye to the old caulk. A utility knife or caulk remover tool works wonders in getting rid of the remnants. Follow up by cleaning the area thoroughly with rubbing alcohol or vinegar—it helps eliminate soap scum and debris. Now, patience is key here—let the surface dry completely before moving on to taping.
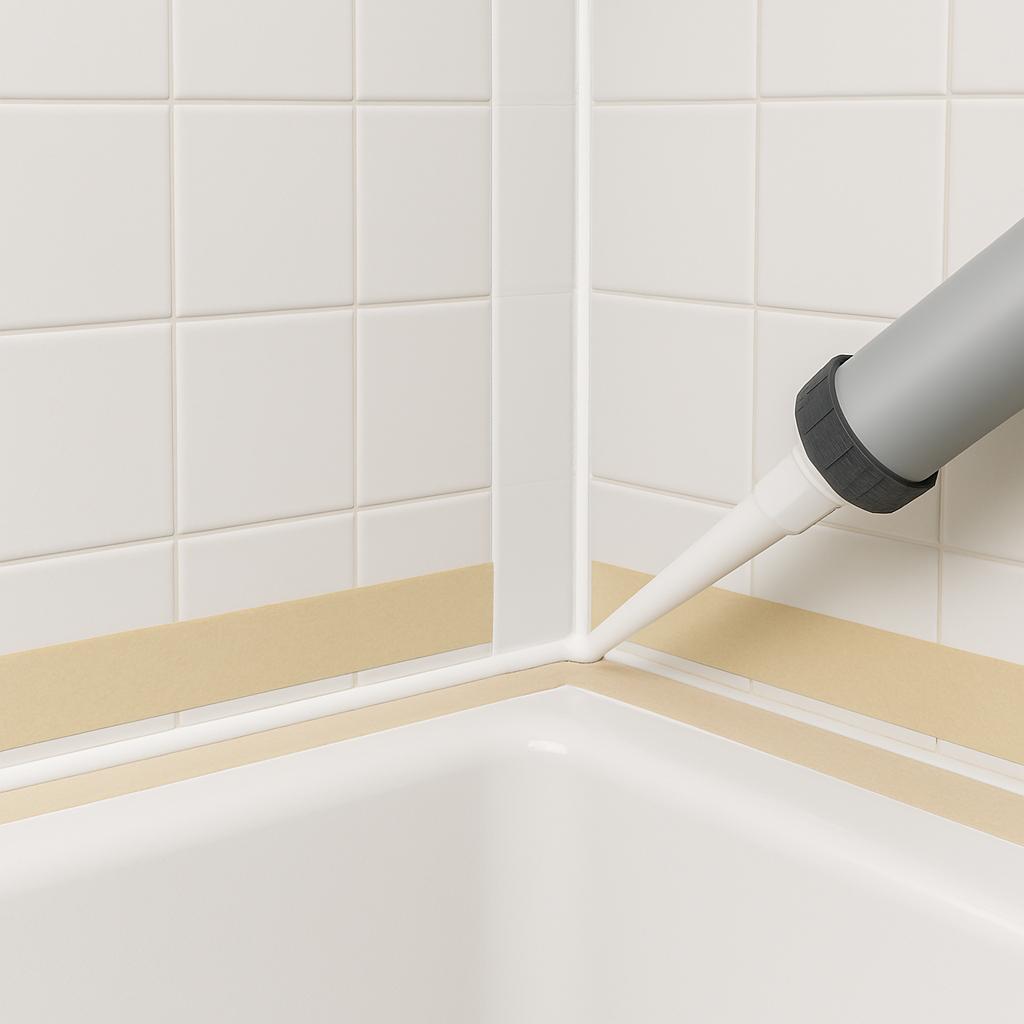
Applying painter’s tape might feel like you’re overthinking it, but it’ll make your life so much easier. Position the tape about ⅛ inch away from the joint on both the vertical wall and the horizontal tub base. This little trick ensures your new caulk bead is uniform and top-notch.
Prepping your caulk tube is the next move. Slice the nozzle at a 45-degree angle, just right for that sweet spot when applying caulk. Make sure to puncture any inner seal and load your tube into the caulk gun. Easy enough, right?
When you’re applying caulk, hold that gun at a 45-degree angle too. Maintain a steady hand while you apply a continuous bead between the tape lines. Consistency here is your friend, ensuring you don’t end up with gaps.
Right after you’ve applied the caulk, get in there with a damp finger or a smoothing tool to press the bead into the joint. Wipe away any excess with a paper towel so nothing looks sloppy. This step can really set your work apart from the rest.
Removing the tape while everything’s still wet is crucial. Slowly peel it away at a 45-degree angle from the joint. This little maneuver guarantees a crisp, clean edge, leaving your work looking professional.
Now comes the hardest step—waiting. You gotta let the caulk cure according to the manufacturer’s instructions, usually around 24 hours. While it might be tempting to hop in and test out your work, patience here will mean your hard graft sticks around for the long haul.
A few tips from someone who’s been there: don’t skimp on the tape, keep your tools clean for each pass, and remember that less is often more with caulk. Mastering these basics means you’ll own the bathroom caulking scene every time.
Beyond the Bathroom: Diverse Applications of Caulk
Caulk isn’t just confined to the bathroom. This handy material thrives in various home improvement settings, proving its versatility time and again. Let’s explore how caulking plays a crucial role beyond tubs and showers.
Ever felt a draft near your windows or doors? Caulking can be your go-to fix for enhancing energy efficiency at home. It seals off those pesky air leaks, making your space more comfortable and potentially lowering energy bills.
In the kitchen, caulk helps keep moisture and mold at bay, especially around sinks and countertops. A good caulking job can extend the life of your kitchen fixtures and make cleaning a whole lot easier.
On to the exterior. Weatherproofing is another major play for caulk. It shields against the elements, keeping rain, snow, and even insects from sneaking into small cracks and crevices. Choosing the right product here is crucial as not all caulks can handle the outdoor conditions.
There’s a wide array of specialty caulks designed for different purposes, like masonry or metal. Make sure you’re picking the right one for the job to ensure durability and effectiveness.
When it comes to outdoor applications, consider the temperature and humidity. These factors can affect how well your caulk adheres and cures. Ignoring these could lead to premature wear and tear or even failure.
Regular inspection and reapplication of caulk along your seams and joints is vital. Environmental factors can cause wear over time, so ongoing maintenance ensures everything stays sealed tight.
Never overlook safety and environmental concerns when working with caulk. Wear gloves, work in a well-ventilated area, and dispose of any waste responsibly. Embracing these practices will keep you safe and the environment clean.
Embracing these techniques can elevate your home improvement skills, transforming your living space into one that’s not just functional but also efficient and well-protected. Caulking, with all its applications, arms you with the power to boost home resilience effortlessly.
Caulk types and when to use: #1 scenario tub or shower tile walls, I recommend a siliconized matching grout caulk either sanded or unsanded. All matching colors are available through different manufacturers. Unsanded 1/8 inch grout line or less or sanded greater than 1/8 inch grout line. #2 acrylic, pvc, fiberglass tub or shower walls. My recommendation 100% silicone or plastic adhesive caulk. #3 windows, doors, cabinets, trim that is being painted. A simple painters caulk, latex based and easily wiped back. Never use 100% silicone on wood finishes or interior window jambs, joints, nail holes, cracks , drywall repairs. The finish paint you brush on will separate from surface. Always use the minimal amount of caulk to do your repair or fill. Caulk is not wood, steel or any miraculous item other than to solve a small function to produce a proper finish.
When using caulks, if you do not want to touch them–latex gloves and a container of water or a tool. I recommend the finger method with or without a latex glove. Also have a good caulk gun–not battery operated, hand operated with quick release.
You can make caulk line gap any size, the smaller the better.